How to Assemble Field Connectable Hydraulic Fittings
Field connectable hydraulic fittings are a great alternative to crimp on fittings for making hose assemblies on site or repairing damaged lines. They are pretty simple to fit if you follow the right procedures.
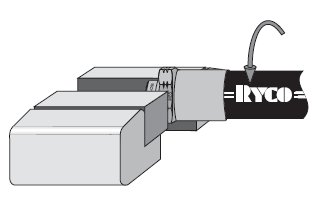
Here are assembly instructions for Ryco Field Attachable Couplings with matched sizes of non-skive hoses BT1, E2, M2, M2G, RQP1, RQP2, RQP5, T1A, T1D, T1F, T2A, T2D, TXA2D, T5 and TPGL series hose:

Step 1:
Cut hose to length required using a cut-off saw.
Ensure hose is cut squarely.
Clean hose bore.

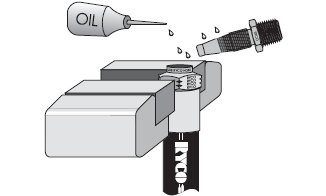
Step 2:
Lightly lubricate outer cover.
Step 3:
Screw anti-clockwise until hose bottoms in ferrule. Ease back between 1/2 and 3/4 of a turn (Note: This is not required for P000-02 ferrule with TPGL hose).
Step 4:
Lightly lubricate insert and inside of hose.
Note: Do not use lubricant for M2G hose, or hose to be used with volatile gases.
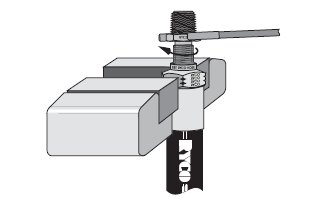
Step 5:
Screw insert clockwise right into ferrule using a continuous motion.
Do not allow hose to turn during operation.
Special Notes:
- For T1A and T1D Hose in sizes -20, -24, -32
In these sizes, K Series Ferrules are not available and A Series Field Attachable Couplings may be used. The cover of hose must be skived at ends. - For T2A, T2D and RQP2 Hose in sizes -24, -32
In these sizes, L Series Ferrules are not available and B Series Field Attachable Couplings may be used. The cover of hose must be skived at ends. - Field Attachable Couplings should not be used at maximum working pressure of hose when temperature exceeds 121°C (250°F). Field Attachable Couplings may be used on suitable hose at over 121°C (250°F) but at reduced working pressure.
Info courtesy of ryco.com.au